Installation Guide
Click to download install instruction
TOOLS NEEDED
Tape measure
Step ladder
- Ruler
Applicator squeegee
Utility Knife
- Fine Sandpape
Surface Preparation
Inspect your walls for any defects such as cracks, peeling paint or bumps and repair as required to ensure a smooth surface. Remove any obstacles such as picture hooks, light switch plates/surrounds etc.
Using the sample supplied, apply to the wall to ensure the wallpaper will adhere. The sample should stick to the surface with reasonable tack whilst still being able to be
peeled off without damage to the wall. If you are unsure, leave the sample applied to the wall overnight and check that it’sstill applied in the morning. If the sample does not feel like it is sticking to the wall or the sample edges peels off the wall overnight we suggest undercoating the wall in Viponds Self-Adhesive Prep Coat.
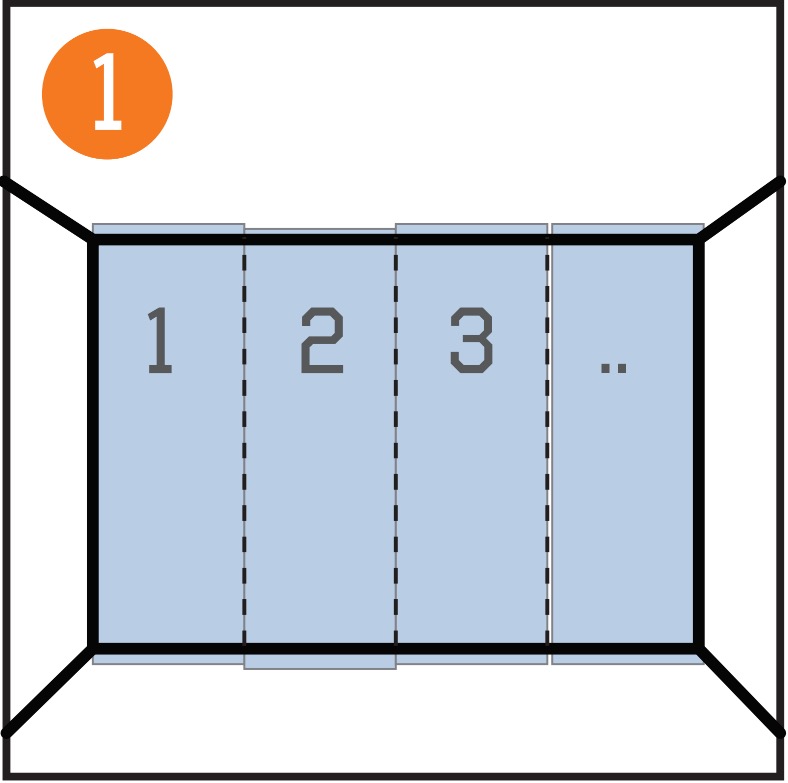
STEP 1
Prepare your drops for installation Start from the left hand side of the wall
with the wallpaper drop indicated as “No.1” and then sequentially as per your labeled
wallpaper panels.
JJ WALLPAPER Installers Tip
Unroll all of your drops and put in order so there is no confusion on what drop goes where
STEP 2
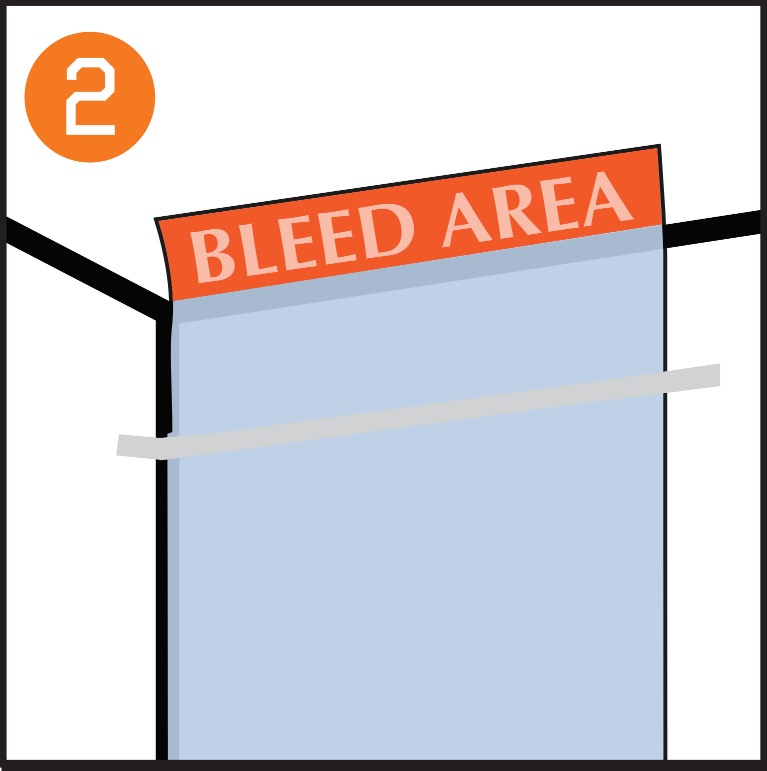
Position drop no.1 Starting with drop 1, line up the left edge with the vertical line of your wall. Line up the top edge with your ceiling, allowing for the additional 30mm bleed along the top which can be trimmed off at the end of the installation. Allow the rest of the drop to unravel, ensuring it is straight and square to the wall.
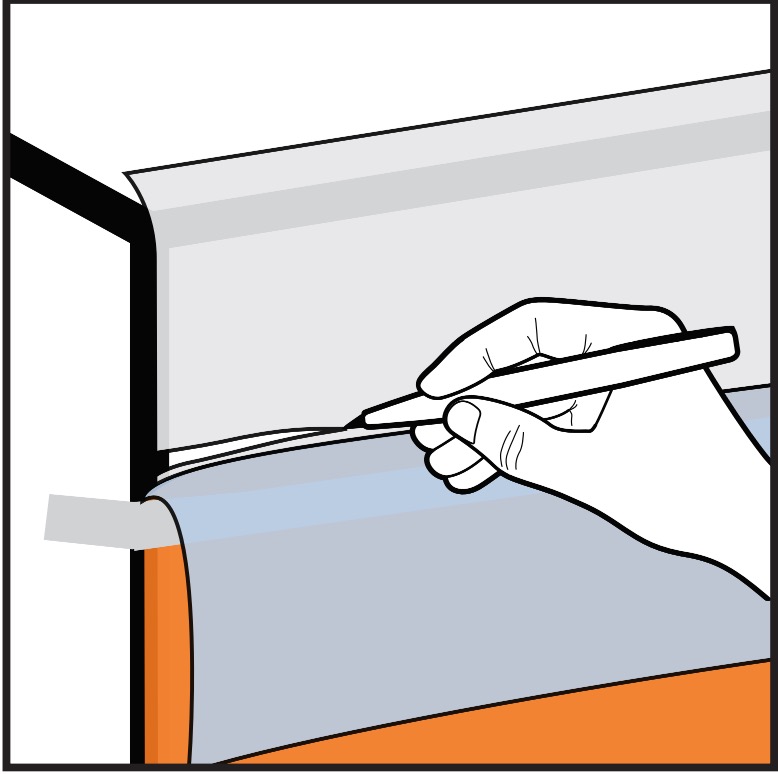
Note: ‘Bleed’ is additional vinyl which has Place masking tape across drop 1 approx been printed to allow for uneven walls or any discrepancies in your measurements. Each ‘drop’ has some of bleed on the top and bottom. 100mm down the drop, securing it in place. Peel the wallpaper away from the backing paper and cut the backing paper off with a stanley knife.
JJ WALLPAPER Installers Tip
Take your time lining up drop 1 as if this is applied straight, it will make the rest of your installation much easie
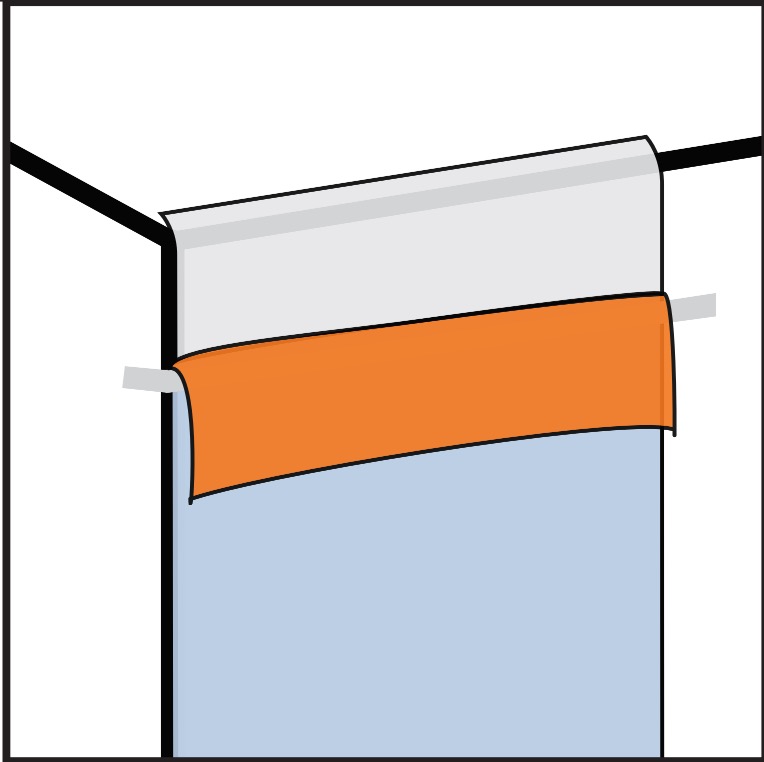
STEP 3
Apply drop no.1 Lightly tack the exposed section of the wallpaper to the top of your wall. As it is only lightly tacked, you can reposition the drop as required. If you are butting the wallpaper into another wall use the vertical left hand edge as your square edge. When you are happy with the position of drop 1, apply it securely onto your wall with the provided application squeegee using the felt edge side only.
JJ WALLPAPER Installers Tip
Only use the felt edge side of the application squeegee to ensure the prints are not
scratched or damaged in anyway
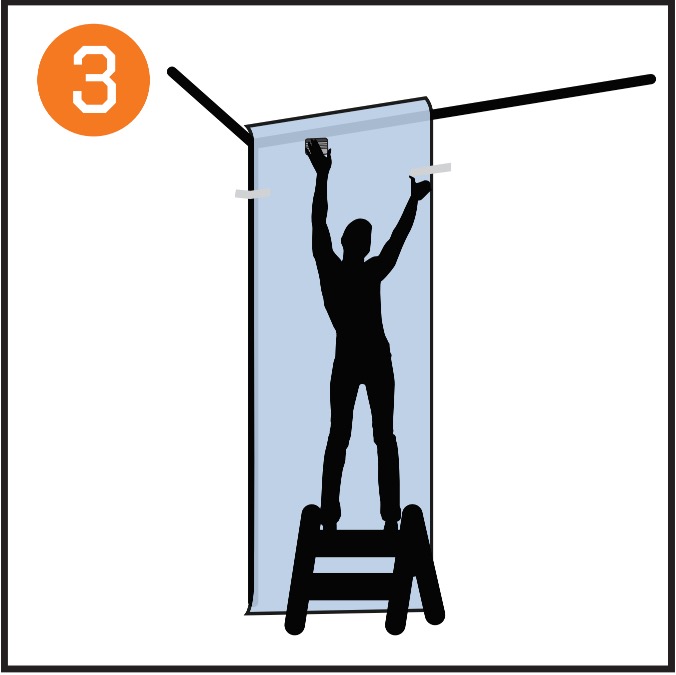
STEP 4
sheet in small sections (approx. 300mm at a time). Working in a left to right motion with your squeegee, apply the wallpaper film to the wall. As you work down the wall, continue peeling back the backing sheet to expose the adhesive side of the film. Keep applying the film in a left to right motion keeping the squeegee edge flat to the wall. Apply using reasonably firm pressure to ensure any bubbles can be Complete application of drop no.1 Slowly and evenly pull down the backing pushed out.
JJ WALLPAPER Installers Tip
Use your 2nd installer to ensure the bottom of the drop stays straight as you apply the
wallpaper film to the wall.
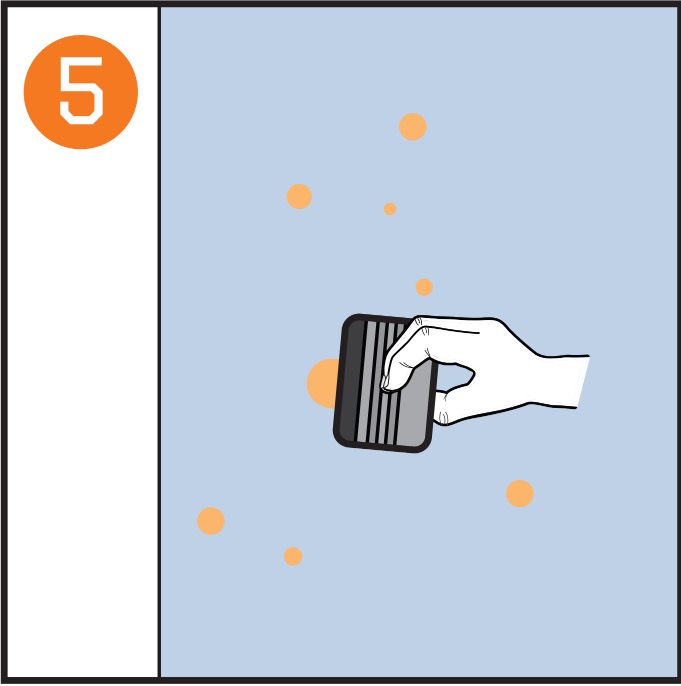
STEP 5
If there are wrinkles or bubbles in your print at the end of the application of drop
no.1 smooth out using your squeegee or peel back the film and re-apply the affected area. Avoid using too much pressure as you may damage or Wrinkles & Bubbles permanently crease the film.
JJ WALLPAPER Installers Tip
If you can’t find any bubbles, try shining a torch on the surface to locate any hiding bubbles/wrinkles.
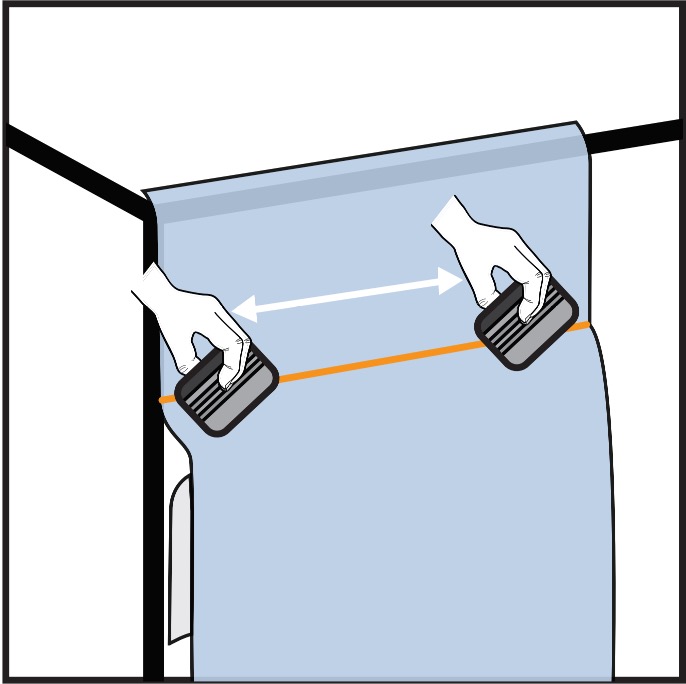
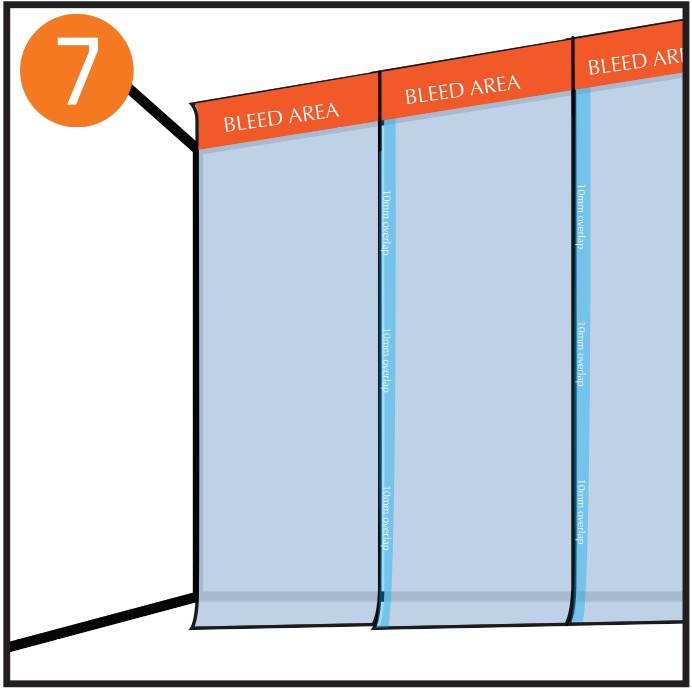
STEP 6
Place the next drop 10-15mm over the right hand edge of the previously installed drop.
Adjust to line up the print/design as best as All ‘drops’ of wallpaper are printed with a
Check Your Overlaps/Joins 10-15mm overlap. required. We recommend placing a small piece of masking tape in 2-3 points down your wall which will act as your vertical line when applying your next drop.

STEP 7
Once you have marked your bleed line repeat steps 2 to 6 until all drops have Apply Additional Drops been applied to the wall.
JJ WALLPAPER Installers Tip
Keep a sharp eye on the top middle and bottom ensuring the prints line up as best possible before applying the entire
IMPORTANT! Align the drop at the top of the wall whilst your 2nd installer helps you align at the base drop.
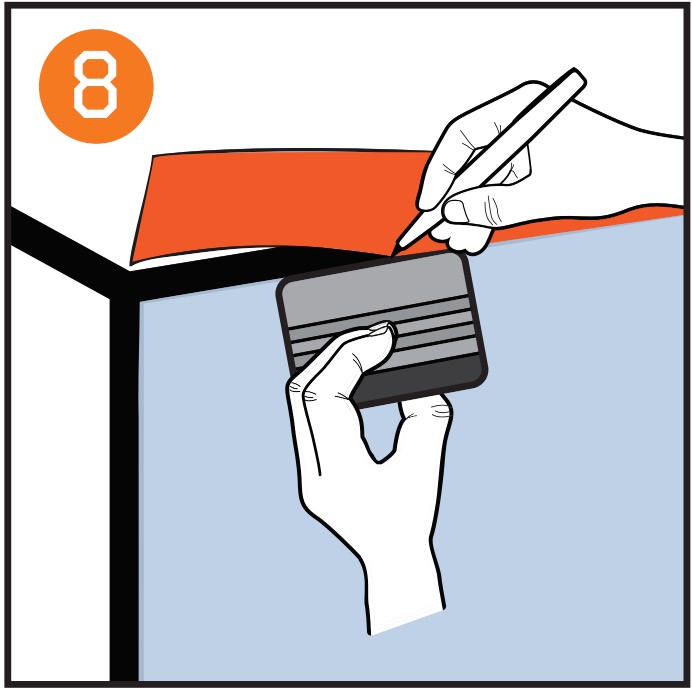
STEP 8
Once all your drops have been applied to the wall, use a sharp blade/knife to
remove any excess print on the Trimming top/bottom or sides of the wall.
JJ WALLPAPER Installers Tip
Make sure your knife/blade is sharp and use a new blade to ensure a clean trim line. If you are unsure about trimming a straight line try using a long edge ruler.